


Suppose you are new to Odoo or want to maximize your inventory system. In that case, the Odoo Inventory Module is a must-have module that can automate stock monitoring and warehouse management and enable you to manage your business efficiently. The module has functionalities to track products and warehouses, stock movements, and reporting. In this tutorial, I’ll guide you through the simple setup process of the Odoo Inventory Module to get you started in minutes.
Let’s go through installing and setting up your Odoo Inventory Module!
1. Getting Started with the Odoo Inventory Module
As a lead-in to creating your Inventory, you first must ensure that the Odoo Inventory Module has been installed and is accessible. The process is as follows:
Installing the Inventory Module
If you have not already acquired the Odoo Inventory Module, it is very easy to do so. From your Odoo dashboard:
- Click on the Apps section.
- Type Inventory into the search field.
- Click Install on the Inventory module.
Ensure that your Odoo instance is updated before proceeding, as some functions rely on the latest version.
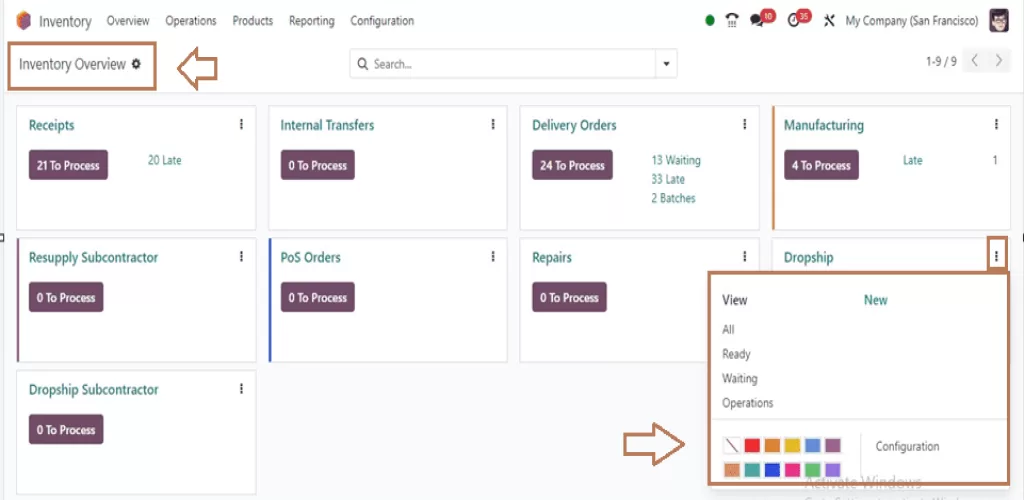
Navigating the Inventory Interface
As you have installed the Inventory Module, now it’s the time to learn the interface. The top parts of the Odoo Inventory dashboard are:
- Products: There, you store all your products in stock.
- Warehouses: There, you set up and manage your physical warehouses.
- Operations: Inventory movements such as incoming deliveries, deliveries, and internal transfers are managed.
The interface is clean, minimal, and can be configured to your liking so that it is easy to manage everything at a glance.
2. Warehouse Setting Configuration
You have installed the module now, so you must configure your warehouses. It is a big step, mainly when dealing with multiple sites or points of storage.
Creating and Handling Warehouses
Within Odoo, you can create as many warehouses as you desire. Each warehouse can be configured uniquely based on its particular needs.
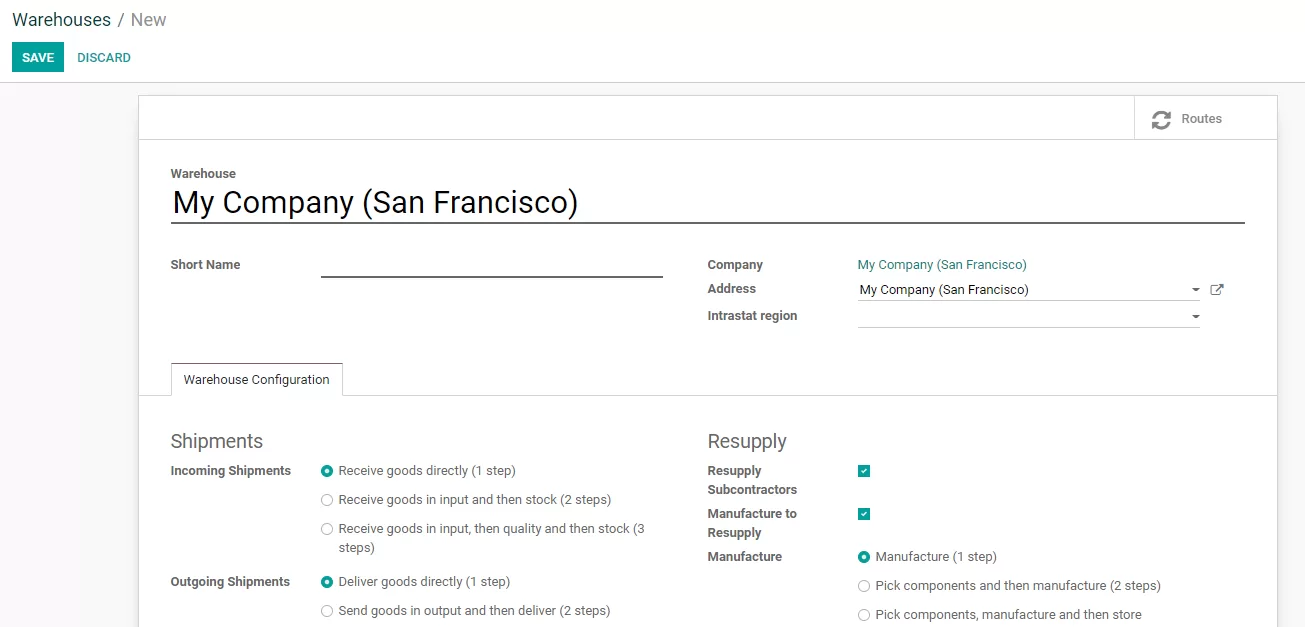
Making a warehouse:
- Access Inventory > Configuration > Warehouses.
- Click Create and enter the warehouse’s name and information (i.e., address and in charge).
- You can create numerous points within the warehouse, i.e., stock area, arrival region, and leave area.
Defining Warehouse Properties
Your configuration of the warehouse will determine product movement. Specific key settings include:
- Stock Picking Policies: Determine the automated or otherwise status of stock picking. Pick from FIFO (First In, First Out) or randomized picking.
- Routes: Routes help to automate the transferring of products from one place to another, warehouses, or even external services like suppliers or delivery carriers.
- Delivery Zones and Carrier Rules: Define your delivery zones and create rules for carrier selection, price, and lead time to optimize your shipping process.
Configuring these properties will optimize your warehouse operations to the maximum extent.
3. Product Configuration
You can now enter your products into the system. Odoo enables you to enter different types of products and set each with its parameters.
Setting up Products in Odoo
You can create three simple types of products:
- Stockable Products: Stockable products can be tracked in real time.
- Consumable Products: Products consumed immediately and do not require tracking in stock.
- Services: Intangible products that do not require inventory tracking.
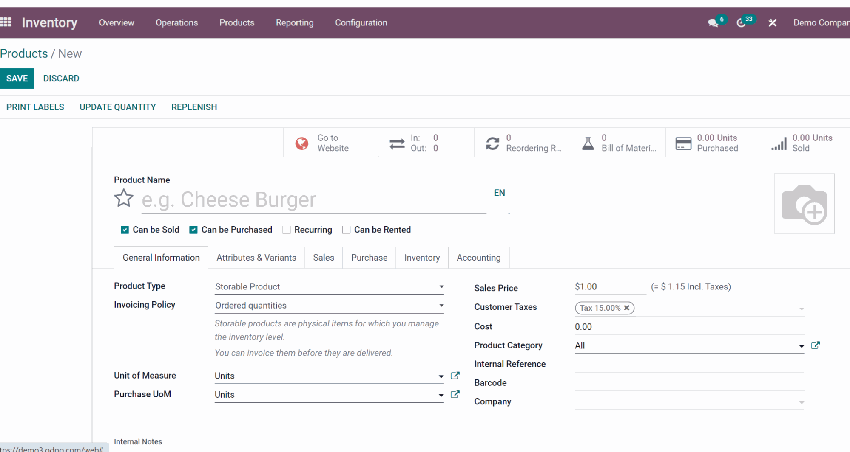
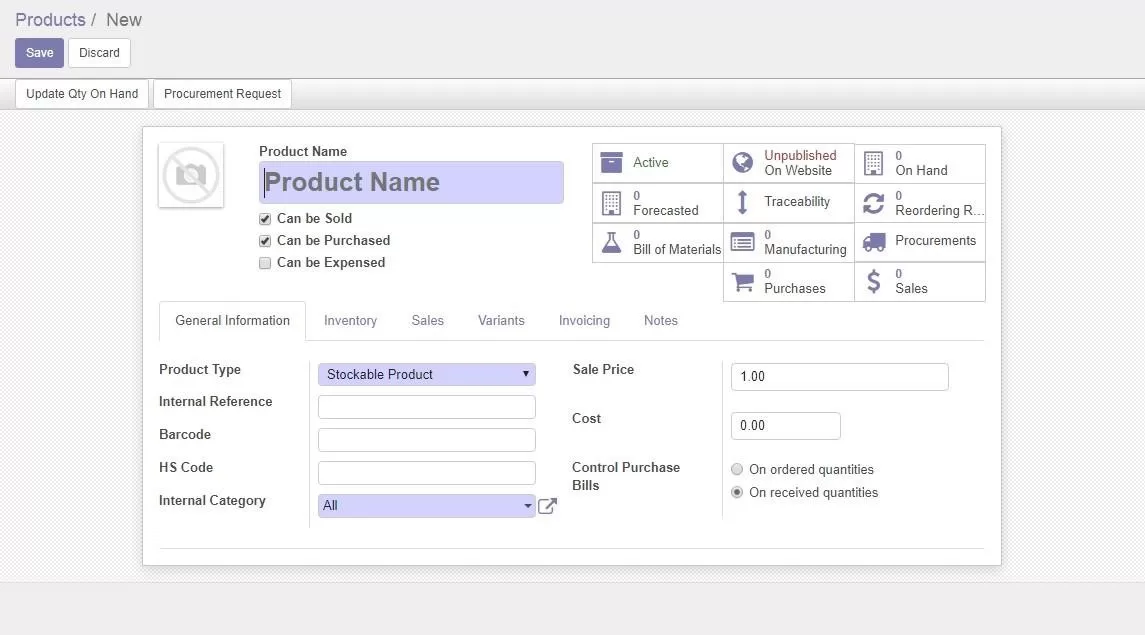
To set up a product:
- Go to Inventory > Products > Products.
- Click Create, and enter the product name and category.
- Select the product type (stockable, consumable, or service).
You may also want to enter pricing, supplier information, and other meaningful attributes.
Product Attributes and Categories
You can readily handle these through product attributes if your products are available in varying versions (e.g., color or size). For instance, a T-shirt may have attributes such as Size (S, M, L) and Color (Red, Blue, Green).
You can also organize products to filter and report efficiently. This eases stock management and allows you to follow similar products.
Barcode Integration
You can activate barcode scanning to accelerate inventory management. Odoo easily supports barcode devices to scan products in and out of your storeroom.
To activate barcode scanning:
- Navigate to Inventory> Configuration > Settings.
- In Barcode, choose barcode support.
- Print barcodes on each product manually or using an external barcode generator.
This configuration will update you automatically when you scan a barcode as product information and stock quantity.
4. Inventory Operations Configuration
Inventory operations are the backbone of stock management. Below, we explain how to configure stock movement, transfer, and valuation.
Stock Movements and Transfers
Odoo has different types of stock movements:
- Incoming Shipments: To receive goods from suppliers.
- Outgoing Shipments: Send goods to customers.
- Internal Transfers: Move stock from one warehouse location to another.
You can apply rules to execute these activities automatically. For example, you can automate the replenishment of the products when they reach a level.
To enable these movements:
- Go to Inventory > Configuration > Warehouse Management.
- Configure your preferred stock-picking policies and routes for each movement type.
Setting up Stock Valuation Methods
Various stock valuation methods impact your accounting records. The most common ones are:
- Standard: Everything is valued by one cost, independent of the purchase price.
- FIFO (First In, First Out): The first products purchased are the first ones sold.
- LIFO (Last In, First Out): The last products purchased are the first ones sold.
To define the method of stock valuation
- Go to Inventory > Configuration > Settings.
- In the Valuation section, select your desired valuation method.
The correct method will impact your profit and loss accounts, so apply the one best suited to your business objectives.
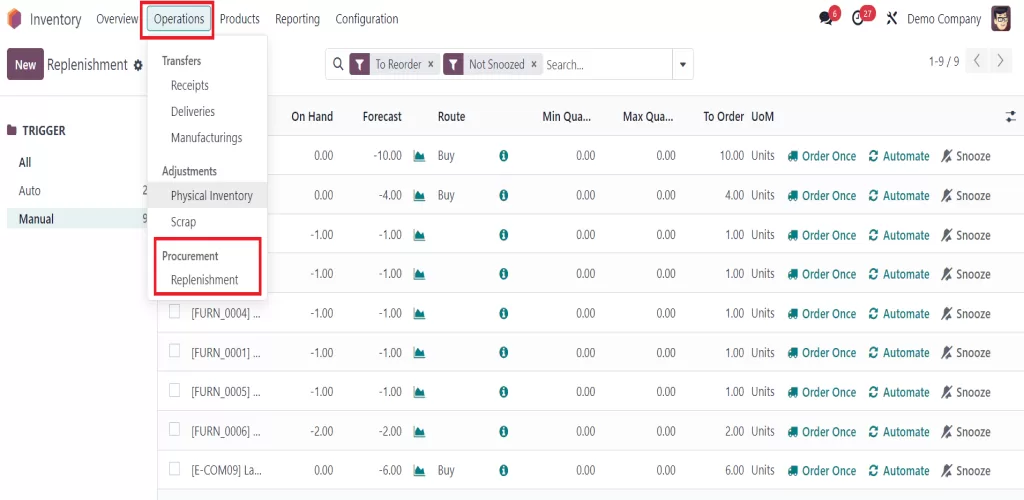
5. Replenishment and Procurement Rules for Inventory
You should determine optimal inventory levels to ensure efficient operations in your warehouses. Odoo enables you to automate the replenishment of stocks to prevent stockouts or overstocking.
Setting Replenishment Triggers
Odoo allows you to define the minimum stock for all items. Once the stock falls below a minimum, Odoo can automatically place purchases or triggers to restock.
Restocking how-to:
- Navigate: Inventory > Products > Products.
- Define minimum stock levels for the desired supplier and every item.
Supplier Management and Purchase Orders
Odoo allows you to handle purchase orders quickly and assign products to suppliers. As soon as your stock level drops to a minimum, Odoo automatically generates purchase orders, helping you keep stock levels under control.
How to configure:
- Navigate to Inventory> Configuration > Suppliers.
- Assign your products to respective suppliers and set lead times, minimum order quantities, and preferred suppliers.
6. Stock Adjustments and Periodic Inventory
Even with automated operation, physical variances in stock are unavoidable. Odoo allows you to easily capture stock adjustments and perform frequent inventories so your stock is always up to date.
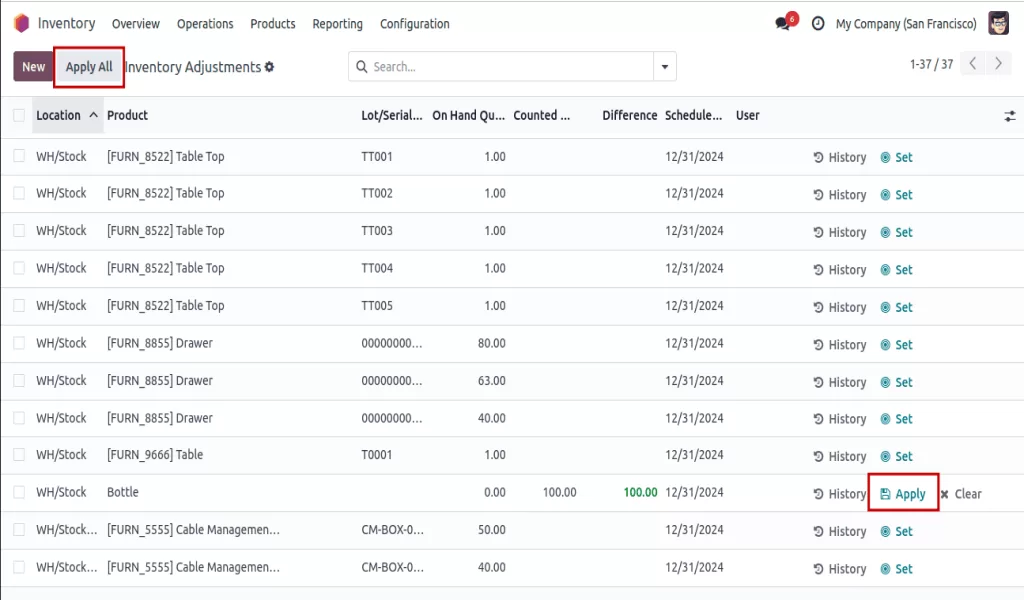
Performing Inventory Adjustments
When stock discrepancies occur, you can enter an Inventory Adjustment to reconcile your actual stock with stock in the system.
To enter an adjustment:
- Go to Inventory > Operations > Inventory Adjustments.
- Enter another change and input the number of stocks per item.
Setting Up Periodic Inventory
If you need to conduct periodic inventory counts, Odoo makes setting them up easy. You can specify how frequently the counts will be carried out (e.g., every month, every quarter), and the system will walk you through the process.
7. Reporting and Analytics
Lastly, you must monitor your inventory performance. Odoo provides reports on stock quantity, movement, and finances.
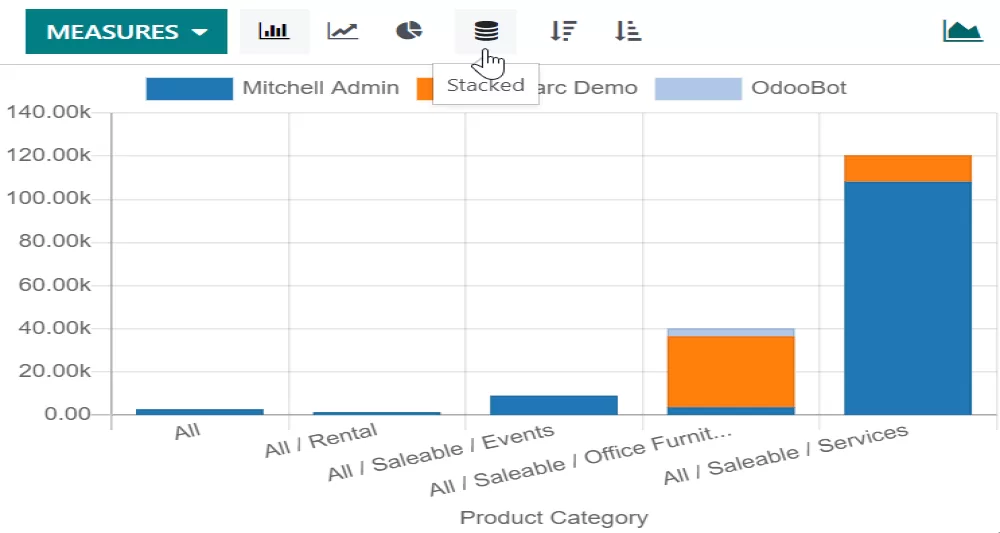
Inventory Reports and Dashboards
Stock movement, valuations, and warehouse efficiency reports are available from the Inventory dashboard. The reports provide an overview of your activity.
You can also create custom dashboards to monitor your most crucial metrics.
- Stock turnover
- Warehouse capacity
- Low stock alerts
By analyzing these reports occasionally, you can make decisions to enhance your operations.
Customizing Reports
Using Odoo’s reporting functions, you can create custom reports. These reports can be tailored to meet your specific needs in the detailed product assessment or stock performance report.
Conclusion
Implementing the Odoo Inventory Module is not necessarily a daunting task. Doing it correctly means you can have your warehouse running smoothly, streamline inventory accuracy, and leave everything else automated except for the things you need. Whether you have one warehouse or several, it won’t matter: Odoo inventory can leave you well-organized and smooth-running.

