


If operational streamlining becomes a critical need for your business, especially in the area of CRM, Odoo CRM will get it done. The open-source tool will track everything about leads right to generating sales forecasts. It sounds like setting up Odoo CRM takes a lot of your time and effort. Believe me, though; breaking it down into manageable steps makes it a real walk in the park. In this beginner’s guide, we’ll go through the entire process of setting up Odoo CRM, from installation to customization.
What is Odoo CRM?
Odoo CRM is a customer relationship management system that deals with the activities that occur between a business and a client. The core purpose for the implementation of CRM software into the business environment would be to make some improvements in the customer business relationship, increase more customers, and at last enhance sales.
It is self-understood because Odoo’s CRM is part of a full ERP system that, through integrating other available modules, will be very useful in managing all kinds of data involved in selling and marketing as well as financing on one system.
Step-by-Step Guide to Setting Up Odoo CRM
Well, now it is the time to configure. Now, I’m going to explain every single step in great detail:
Step 1: Odoo CRM Installation
The installation of the application is the very best way that help someone start right from scratch with entry into the Odoo CRM. With its self-hosting feature, it can be installed in one’s set of servers; however, it has hosted-installed versions available too. In this case, the new user must install it in the hosted environment, which would take most of ‘the aches from making procedures’.
1.1 Sign up for Odoo
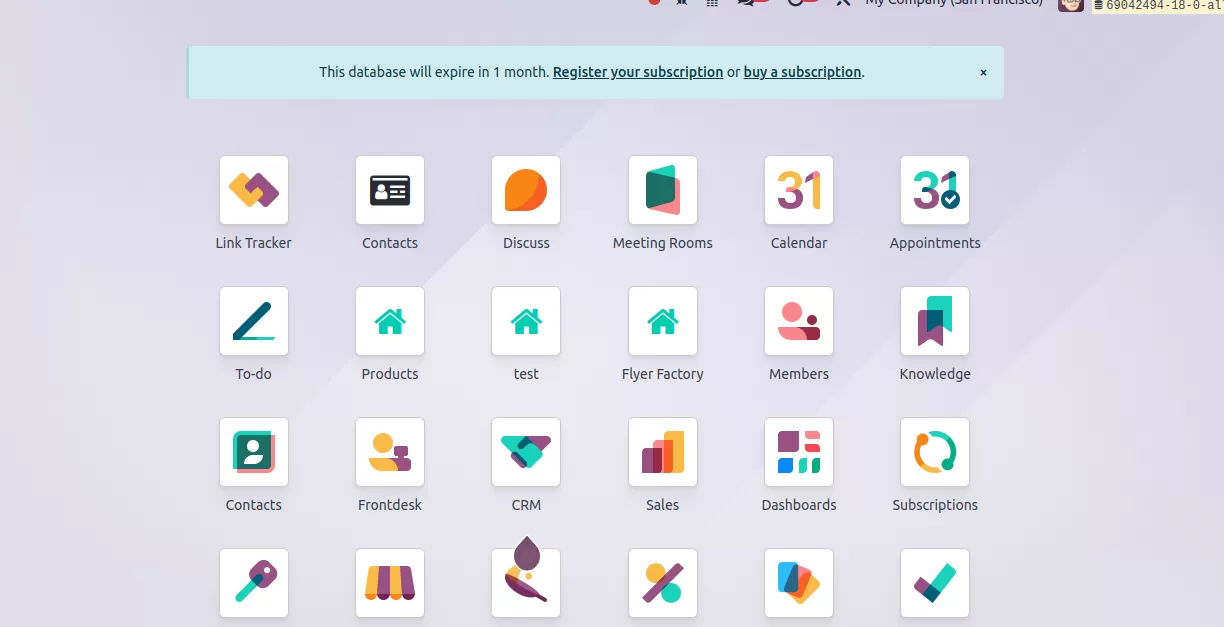
Visit the website, Odoo, and log in. Then you would be presented with the opportunity to add the application of CRM. That thing would have to be installed on your server in order to be downloaded as a community edition.
1.2 Choose the CRM App
Log in to Odoo afterward, then search through Apps for CRM. It should automatically download on your dashboard but install in it.
1.3 You’re Done!
You now have the app installed. You will now find the CRM application on your Odoo application’s dashboard. Let’s input your company information.
Step 2: Input Company Information
You can now add some general information about your company. That way, Odoo will adjust your CRM.
2.1 Go to Settings
You are supposed to click on the “Settings” tab, up top menu for your Odoo CRM dashboard.
2.2 Enter Company Details
There you would fill in the name of the company, company logo, website, and so on. You may fill in such necessary information since CRM will draw quotations from reports as well as from other communications addressed to a client.
2.3 Save Changes
Now, you have completed filling in your details and then saved all the modifications you did. Now, you are finally installed on Odoo!

Step 3: CRM Features Customizations
There are many features in Odoo CRM. You can activate some of them or all of them based on your requirements and deactivate the rest. Now, let’s focus on a few common configurations.
3.1 Lead Stages
Another auto feature that the adoption of CRM introduces with integrating it into Odoo is lead management. You could come up with various stages under leads depending on what your sales process is like. For example:
- This would be a new lead.
- Reached is taken as a lead that has reached you and made contact.
- Qualified-the lead that shows interest.
- Won-this is considered a customer
- Lost- A lead becomes not a customer.
You can also alter these stages according to your requirements using the top menu CRM Settings > Stages. There, you may add a new stage, edit an existing one and delete those which you would not like to be in the sales cycle of yours
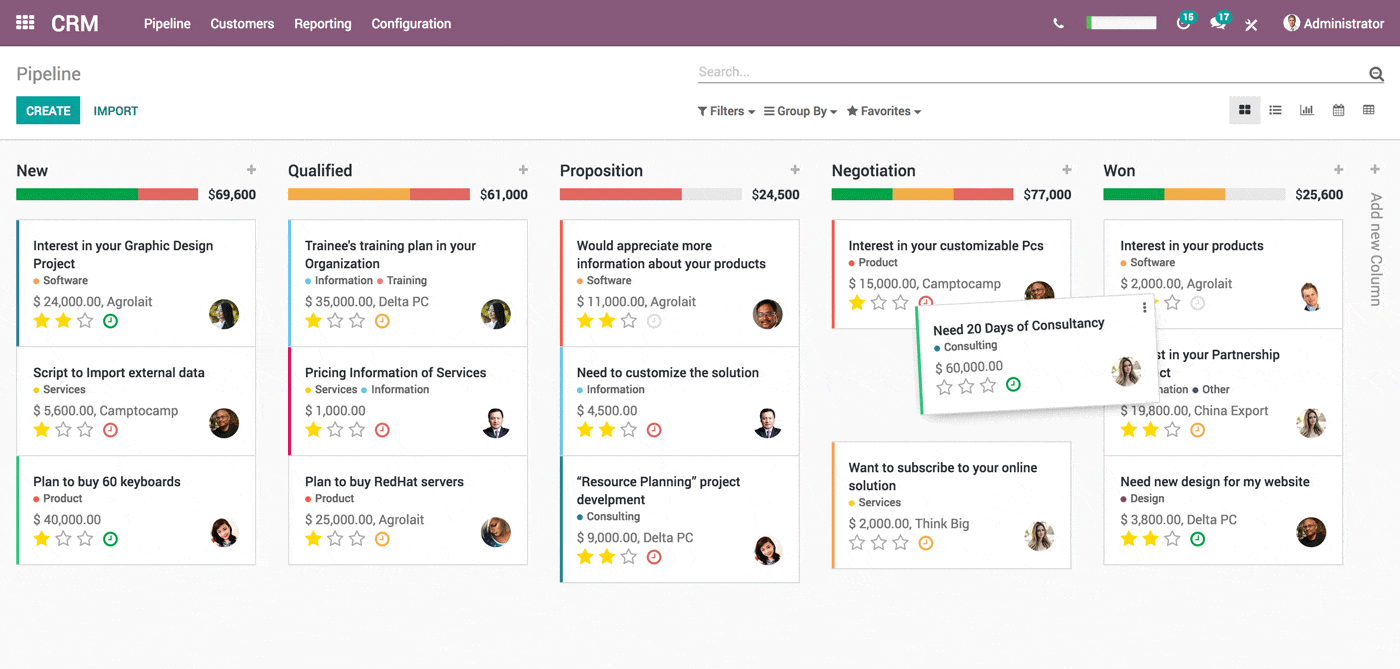
3.2 Sales Pipelines Settings
Sales Pipeline is the graphical representation of the whole sales process. Using Odoo, one can create as many pipelines based on the types, products, teams, or regions. To do this:
- Go to CRM > Pipelines
- Click on the button Create New Pipeline and any name for your pipeline
- Now, you must use the pipeline stages as above.
Then you are just dragging your leads into pipelines, and then that status goes rather smoothly with this.
Step 4: Add Leads and Contacts
Add a little bit of lead contact information into the system now.
4.1 Adding Leads Manually
Open the leads of the CRM, and select Create. Start adding all sorts of information which could include all data that start from the names to company with their respective details on the contacts. Set up a particular lead in your pipeline with his respective stage
4.2 Importing Leads
Import big lists of contacts if you have them. Odoo can import right from your CSV/Excel file. To import leads:
- Go to CRM > Leads
- Click the Import button
- Upload your CSV/Excel file and map the fields
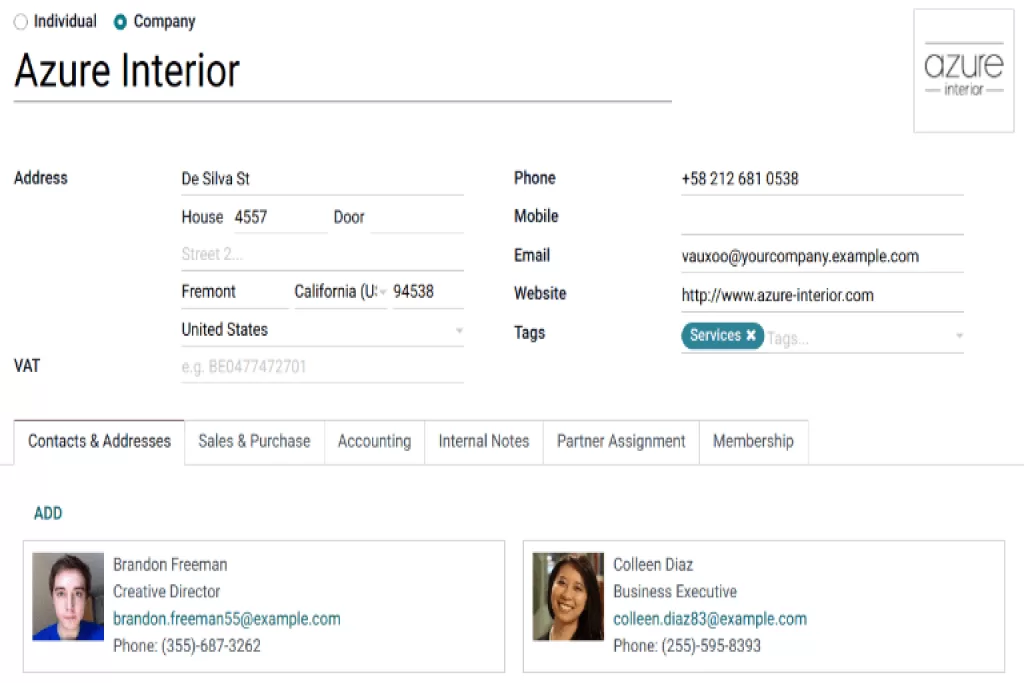
4.3 Adding Contacts
Contacts will be the people whom you are going to connect with. There are so many different ways to import multiple contacts-the same way as importing leads above or a single contact.
Step 5: Automate Your Workflow
Odoo CRM allows one to automate almost everything, and hence as much time is saved through the entire process. Auto follow-up emails are also allowed, thus assigning specific team members as automatic assigner leads or updated leads based on any specific lead stages.
5.1 Automated Actions Setup
Auto action can be configured in the following way:
- Go to Settings > Automation
- Can be based on any parameter where the lead has reached a predetermined count or days have passed beyond
5.2 Use Email Templates
Another fabulous thing about Odoo CRM relates to the email conversation automation, if you discuss further about it, any template can be created. Probably relates to an event, perhaps so every time leads are getting created. Find all your changes over there; go to settings > email templates.

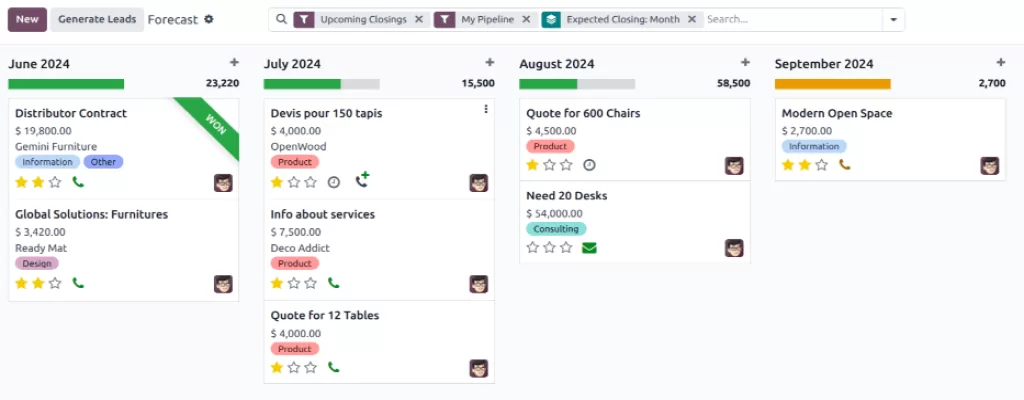
Step 6: Track and report on CRM data
Now that you have generated leads with this system, the next big thing is monitoring your performance. Odoo CRM is quite capable of generating reports that are going to throw very deep insights into the work done by your sales.
6.1 Reports Customization
You can always have your report at the end of a single click on the button on your CRM. This may include detailed reports on those fronts:
- Lead conversion rate
- Total Sales
- Team Performance
To do that, go to the Reporting area of your Odoo CRM and pick one.
Conclusion
You now have set up your Odoo CRM. Now you enjoy lead tracking, lead sales tracking, and maybe workflow automation; you get to have that one solid tool that can use customer relationships at its best.
This means you can grow with the business while you’re always updating and improving the CRM, constantly trying to make it better at fitting your ever-changing needs. From these steps and tips, I hope you feel a little more confident navigating Odoo CRM.

