


Odoo HR module is a robust module that allows businesses to handle leave requests with ease. Rather than dealing with emails, spreadsheets, and paper forms, Odoo brings all time-off procedures under one simple-to-use platform. Employees can simply send leave requests, whereas managers and HR staff can approve or reject them with minimal clicks. Such automation not only saves time but also minimizes the chances of human error.
Configuring Time Off Types
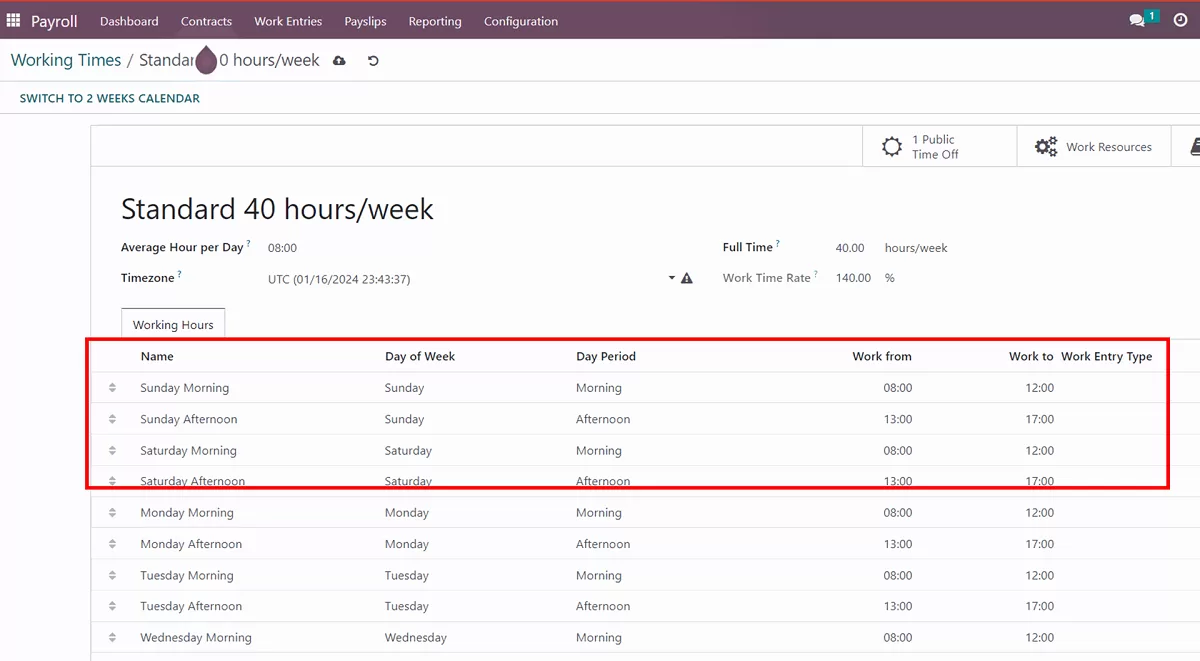
HR professionals must set up the leave types that can be accessed in the system prior to the employees being able to request leave. It ensures that the leave types are aligned with company policy.
Step 1. Go to Time Off Types
- Open the Time Off section.
- Proceed to Configuration > Leave Types.
Step 2. Creating Categories for Leave
- Choose categories of leave appropriate to your firm’s policy. For instance:
1.Vacation or Paid Time Off (PTO)
2.Sick Leave Parental
3.Leave Unpaid Leave Click on “Create” to make a new category and enter the crucial information: Name of the leave type.
4.Allocation Mode may be fixed, by request, or no allocation. - Fixed allocations may be applied for yearly leave allowances, while “by request” allows employees to request specific days off.
- Validation Process. Select if the leave has to be approved by one or more managers. Tracking. Enable or disable turn tracking for leaves that apply to a specific department or set of employees.
Step 3. Setup of Validation Policies and Rules
Tailor validation rules, e.g., maximum leave duration or limitations for specific roles. For instance, you can provide two weeks of continuous leave but limit overall PTO to 20 days per year.
With these configurations on, the employees can now easily send in their requests.
Requesting Time Off In Odoo HR
Step 1. Sending a Request
- Login to the Odoo platform and navigate to My Dashboard.
- Go to the Time Off module.
- Click the New Request button.
- One appears, asking them to provide all-important details in the following:
1.Leave Type (i.e., Vacation, Sick Leave).
2.Start Date and End Date.
3.Optional Notes (e.g., reasons for the absence).
Step 2. Confirm Availability Right Away
Odoo allows employees to see their time-off balance in real-time so that they do not overdo it. For example, if an employee has 10 vacation days but tries to take 15, Odoo will notify them in real-time.
Step 3. Issuing the Request
Once the form is filled out, employees simply click on Submit. Depending on the validation rules set, the request will be forwarded to the appropriate manager(s) for approval.
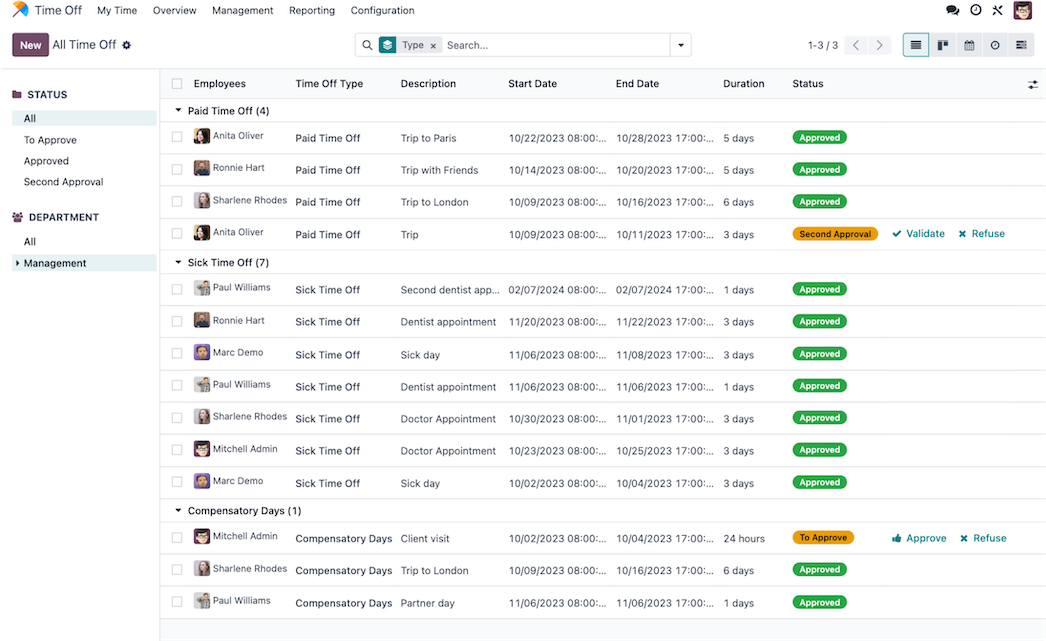
Granting Time Off Requests
Step 1. Screening Outstanding Requests
- If a request is submitted by an employee, it will be accessible to their manager. To see and manage requests:
1.Open the Time Off area.
2.Proceed to the Time Off Requests menu.
3.Organize requests by their status, such as pending, approved, or denied.
Step 2. Approving or Rejecting Requests
Clicking on a request displays details such as the category of leave, dates, and comments by employees. If all is well:
Approve the request with a single click.
Or, comment and Refuse the request when necessary (for instance, to satisfy staff restrictions at the peak projects).
Step 3. Notifications to Employees
Once the decision has been made, Odoo informs the employee via an email or a notification in the Odoo interface. This avoids confusion and keeps everyone posted.
Streamline Time Off Management with Odoo
To get the most out of Odoo HR, see what other modules it is connected to, such as Payroll and Attendance. Combined, they are an end-to-end HR solution with all the components of the employee life cycle. Would you like to simplify managing your time off even further? Contact Odoo ERP Implementation experts today with a free demo and see the difference for yourself.


A Comprehensive Guide for Recruitment Processing in Odoo HR Module
May 2, 2025[…] having a successful hiring process. For small and medium-sized businesses with Odoo installed, the Odoo HR module offers an effective set of tools to accelerate, enhance, and automate […]